Okay to start the class we needed a character turnaround of Shaggy and there was conveniently one found on google image search. which I cant find anymore but I have my cut up version. I took it into photoshop, cut out the front and side view and resized them so they matched up perfectly.


Then the next step is to import them into my front and side image planes. I named them front and side and droped them into my source images folder. I opened a new project in Maya and made sure it was set. Go to your 4 panel view (Persp/Side/Front/Top) and then open your front view. Inside the stage area open View from your menu bar, then go down to Image Plane > Import Image.

It should open your source images folder if you have your project set. Inside that select your front picture and open. You should now see your picture on the stage. You will want to line it up correctly so the feet touch the bottom line and the middle line cuts the body in half (or close to that). If you click off of the picture you can reselect by following the same menu choices ( View > Image Plane > Image Plane Attributes > ImagePlane1 ) You can move it around by clicking open your Channel box/layer editor while the picture is selected. Then you use your Center X, Y, and Z numbers to move it. Center Z should move it back ward away from your stage. You will want to keep track of what number you use for that in order to keep consistency with your side view.

Now do the same thing with your side view. Import your image plane the same way. Then click your perspective view and you should see this.

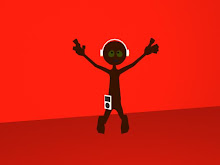
So now you can finally begin modeling. We started with a hand which took about 4 hours to complete, and then we were kind of let loose to play with vertices and polygons.. lol I found the hardest peices were the face and hair. I know I was trying to do this as sort of a tutorial but I am tired and so I may add more later. Here are a few pictures of my final model though. I got an A (95/100)


-Anna
No comments:
Post a Comment